Ladakh 2007 – Day 2

Day 2 (1-Aug-2007):
Finally, the extra hot day followed by a not so pleasant night had one advantage; I didn’t need to waste the battery of my alarm to get up.
Yes, you guessed it right. The shelter I found for the night was a non-a/c room.

After taking care of the morning duties & settling the hotel bill, it was time to again hit the road.

The morning time wasn’t as pleasant as I was expecting it to be. Worried about the prospect of getting caught by noon Sun, while still in plains, I zoomed off the start line like a racer aiming to take the hole-shot. Leaving behind the sparse traffic of city, I was soon zipping towards the mountains (don’t get your pulse racing, it wasn’t that hot pace as it might sound :)), wanting to catch the cooler weather of mountains as soon as possible.

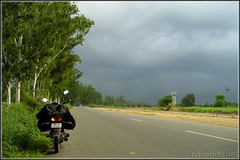
Hardly an hour into the ride, it seems the cooler weather wanted to catch me before I could catch him, in mountains. In horizon I see dark rain clouds filling the sky. Not able to decide if I should feel happy (getting rid of the heat) or should feel sad (might get wet – just the riding jacket was water proof), I was caught by the thundering rain. Before I could stop and put on the rain pant, I was drenched. So, I decided to save the effort and let my body soak in some fresh water. I opened the waterproof jacket a bit, to make sure the upper body doesn’t complain of being deprived of getting wet in rain water, while the lower body does. Keeping my safety in mind (and also didn’t want to have rain drops hitting my face), I ignored complains of my head that he also wanted to experience the feeling of getting wet in rain.

While the rain lasted for just a few km’s but it made the rising mercury crash on the floor. In a space of few minutes the weather has changed drastically and I am yet to see “m” of mountain.

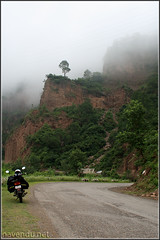
Clouds waiting for me

The road from Jalandhar (once you turn towards Pathankot) after being 4 lane initially had turned into a two lane road with road work going on in patches and then some patches of pot holed & bumpy surface.
Having being spoiled by the boring NH1 till now, the narrow road along with some traffic was making me feel good.

Enjoying a ride on a decent stretch of road coupled with some good weather, what else can one ask for? Well, food to being with. So, when the breakfast deprived stomach decided that it had enough; I had to pull over at the next decent looking “dhaba” for lunch.

After making stomach happy, it was time to get back on the road. As Pathankot got closer, the traffic started to pick up, so I dropped the pace and now I had to pass through the city towards Chamba.

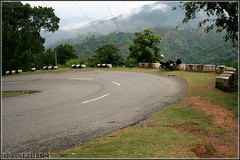
Asking for directions a couple of times, I crossed the city. Soon I was greeted with greenery and twisties. While the fun quotient goes up by a few notches, the pace drops down a bit, as I wanted to enjoy every moment of riding.

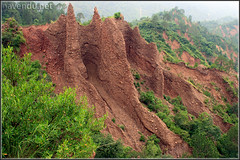
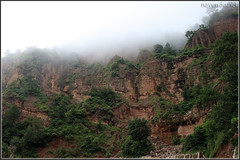
From hazy views, to cloudy & green peaks to strange sand formations, it was a very productive day for the eyes, after the hot ‘n’ humid disaster on previous day.

Interesting Sand formation Cloudy mountains

Perfect(?) riding destination

When one is riding for the first time, through a location as scenic as this one, and then see turn off point for places like Dalhousie & Khajjar. The choice of where to go becomes harder. It wasn’t an easy choice for me to skip those destinations and stick onto the road towards Chamba. One thing that helped the decision was the fact that, soon it would become dark. So, I left my lust (with a promise that I’ll come back soon and pick it up) for more exploration at those turn off points and carried on towards Chamba.
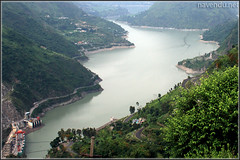
Some dam enroute to Chamba Knee scraping?

Before it could get dark, I was in Chamba. After a short search for night halt, it was time to take a walk. The little town was buzzing with activity, all thanks to some “mela” happening in the nearby ground.

Went to the bus stand to enquire about the road status of Sach Pass, while the Pass was open the bad news was that due to landslides the road is blocked after Killar. Having come so far, I was in no mood to turn back without trying. So I decided to enter the Pangi Valley, first thing in the morning.

To have a backup plan, in case I’m unable to cross over, I called up Roy in the plains, as he would be better informed about the latest news. With some news of unrest a few days before I started the ride, I was not feeling comfortable in riding alone into the Kashmir valley, for the first time. The information I got was positive, so Kashmir valley was one of the backup plans for now.

With the plan frozen for next day’s ride, had a quick dinner and went to sleep.

Ladakh 2007 – Day 1

As they say, better late than never. 🙂

So, I have decided to clear the backlog of my pictures and trip logs of my various rides to Ladakh. (I know a few guys might have fainted/would be jumping in joy after they would have read my decision to clear the backlogs.) (No the earthquake that just hit the Capital has anything to do with this.)

After I missed riding to Ladakh in 2006, finally visited the land of highest mountain passes in 2007. Since then, every year, every ride has been a exciting experience for me.

Let me start by sharing some of the pics from 2007 trip, that are already uploaded (and hence might not be new for some).

Year: 2007
Route: Delhi – Jalandhar – Chamba – Failed attempt to cross Sach Pass – Nurpur – Pathankot – Srinagar – Kargil – Suru – Pensi La – Drang Drung Glacier – Parkachik – Lamayuru – Leh – Khardung La – Hundar – Panamik – Khardung La – Leh – Pangong Tso – Leh – Pang – Keylong – Manali – Delhi.

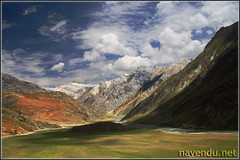
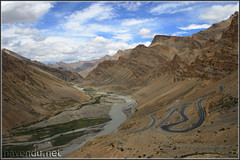
Landscape after Zoji La

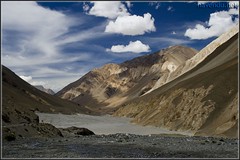
Landscape near PangongTso Lake

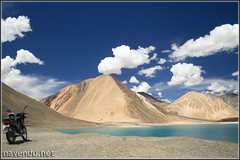
Pangong Tso

Gata Loops

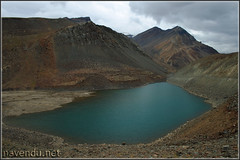
Suraj Tal

LADAKH – the Holy Grail of any bike tourer worth his salt – a pilgrimage like none other – a must do at least once before hanging up your touring leathers. Having missed out last year, I was very excited when THE ride this year was looking on the cards. The only disappointments: had to ride solo and unable to ride on my Bullet Electra, not that I regretted either by the end.

Preparations:
Having read/heard so many stories from people who have been to Ladakh about how AMS rendered the rider totally out of order.
How the high altitude (hence thin air & as a result low oxygen) made the motorcycle struggle to climb due to power loss, forcing the rider to sit and start jetting the carburetor in middle of nowhere.
Saying that I wasn’t worried would be lying to oneself. What was comforting though was the fact that in recent time, everyone who has gone to Ladakh was able to return back.

Motorcycle:
I would be riding in one the harshest (if not “the”) terrain in India, on the motorcycle that has crossed 100,000km’s mark sometime back. As around 15,000km’s back I had got my engine fixed by replacing all the worn out parts. I was sure that a good servicing before the ride should be enough for me to return back. Hence, got the machine checked up before starting the journey.

As, bike was running on 2.75×18 Zapper FV and 3.25×18 Michelin M45, I wanted a bit more non-tarmac friendly tyres. After having discussions with friends who have been to Ladakh, I picked up 2.75×18 Secura Sport (borrowed the one used by Arpan on his P150 Classic in 2006) and a new 3.00×18 TVS Jumbo.
After changing the tyres, I did a couple of small rides to get used to the grip (or the lack of it) provided by them.
Now my only worry was punctures, but decided not to load myself with foot pump and all. Decided that if I had a flat, will take it as part of adventure.

Rider:
Not the fittest but neither the most unfit person, I wasn’t sure if in few days doing anything out of ordinary would help. So, I decided to save the trouble of hitting the gym and trying to improve my fitness in a few days.
For my riding gear/clothing I had the following:
– Frank Thomas riding jacket (water proof and with removable thermal inner)
– A pair of thermals inners.
– Duck back rain coat.
– Gloves.
– Helmet with clear visor (in case I have to ride in night).

Gadgets:
– Olympus C-350 (3MP, 3x Zoom)
– Canon 400D with 18-55 kit lense. (Bought it a few days before the ride. Lack of experience in using DSLR’s spoiled the photography experience a bit).
– Vivitar Tripod. (For times when I feel like posing a bit.)
– Mini DV Sony Handycam.
– Garmin Vista Cx GPS. (For those times when I get lost. :))

Luggage:
– Clothes & other stuff that I carry on any ride, stuffed in Camster saddle bag.
– Sleeping bag tied on the pillion seat.
– Back pack with gadgets, maps books (Lonely Planet & Eicher Road Atlas) and other stuff that require quick access.
– As my toolkit, I was carrying all the spanners and screw drivers using which I could remove/fix anything on the bike.
– List of spares, I have already documented …:navendu:… Spare Parts to Carry on a Road Trip

Transport:
Having ridden to Delhi and back to Pune, on NH8, I wasn’t too excited to spend more than 3 days in the journey on the not-so-exciting (as compared to mountains) NH8. More so when those days could be well spend up in the mountains. Hence, I decided to transport the bike to Delhi.
A couple of years back, having send my bikes via train to Bangalore. I wasn’t too happy with the experience, more so when I didn’t want to travel via train myself, I opted for Gati as the carrier of my bike to and back from the start point.
With bike going via Gati, it was air travel for me, as I would be accompanied with my Wife and ~8months old daughter.

Day 1 (31-July-2007):
After dropping my wife and daughter at in laws place, the ride started on 31-July.
It was a hot ‘n’ humid day when I started from Ghaziabad. The not-so-comfortable riding jacket didn’t help the matter much. By the time I was out on NH1, I was feeling like a tired warrior who has won a battle against a zillion enemies.

After a rather boring ride on the NH1, with frequent breaks to beat the heat, I managed to reach the outskirts of Jalandhar as Sun decided that he had enough of troubling me, for the day. With no plans of riding in dark, I started to enter the Jalandhar city and search for shelter.

Just like most of my rides, no pictures of Day1. Oh well, almost no pictures. 🙂
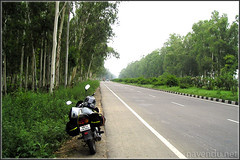
NH1

DIY – A MUST for any rider.

Twice in a short duration, on two different bikes, dealing with road side mechanics a good 500+km’s apart has made me rethink about the importance of DIY and how I will have to carry all the required tools with me, all the time, irrespective of If I’m going on a small 300km’s ride or a 3,000km’s road trip.

It was in Jan’2012, when I was returning back from MMSC, I noticed the drive chain on the R15 has gone a bit too loose. As I wasn’t carrying any tools (normally I does, but this being a straight run on NH’s to and back, I decided to travel light), I decided to enter into the next town, Dharwad. Failed to spot any Yamaha service center, I gathered courage and pulled over at a clean looking road side auto garage.

To me, R15 has one of the most idiot-proof methods of setting the drive chain tension. The adjuster on both sides has nicely made sockets, which require one to select the correct one on both sides depending on the required tension in drive chain (that can be checked by hand).

After the “chotu ustad” was done setting the chain. I had a look at the adjustment and found them not to be matching. After I pointed out the same to “chotu ustad”, I was given a gyan on how he has verified and found that this is the correct setting. I request him to please set the same setting on both side but he assured me that this is the correct setting and I’ll be fine (Looks like here we have someone who knows better than the engineer’s working at Yamaha). With no option, I had to carry on. The end result was, by the time I reached home the chain was making very nicely uncomfortable noise, one that got fixed after visiting the YFS.

Karizma was involved in the next instance. After I was returning back from Mumbai, I noticed that the drive chain has become too tight, even though it was adjusted to correct setting in Mumbai. Again, with no tools at my disposal, I had to try my luck with another road side mechanic (Note to self, I’m very bad at gambling and should never try it :)) and I found one in Lonavala. With Karizma having a bit more conventional (though a bit less intuitive) way of setting the drive chain setting, I was a bit less worried.
After getting the chain setting done, in a couple of km’s I realized I have again got it messed up. By the time I limped back to home the chain was making even worse noise than what R15’s chain was making.

Twice bitten I’m going to be worried, very worried, next time I visit some unknown road side hack.
Now, the story doesn’t end here. It’s not that visiting an authorized service center will be a guarantee of getting the work done correctly. A couple of years back, a friend got his ZMA rebuild at a Hero Honda authorized service center. In a few minutes, after he picked his bike, I got a call from him asking for some reliable mechanic, as his chain is tightened to such an extent that it could break any moment.
Having tried and found a road side mechanic, near my home, we went to him and got the work done.

So, what’s the conclusion? I’m a back gambler and I’m not going to trust any random mechanic, road side or someone hired by authorized service center.

So, what’s the solution? DIY. Carry all the tools, all the time, needed to fix trivial things like adjusting drive chain tension and other stuff. If you are one of those who tour/travel a lot, it won’t be too long before you could be in a similar position.

Nov 2010 Ride to Taj Mahal and Madhya Pradesh added

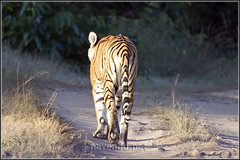
Taj Tigress on her morning walk

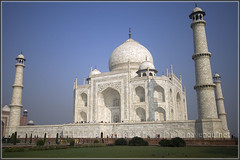
Taj Mahal – The Epitome of Love.

Madhya Pradesh – The Heart of India.


Just added the main page of the trip log, for the ride to Taj Mahal and Madhya Pradesh done in Nov 2010. Check out the trip log here.

Its a work in progress and I hope to finish things in next couple of days.

Mailbox #3: Tuning Carburetor for high altitude and Tubeless over Tube type tyres.

Had it was not for a couple of queries send from Aditya, lazy me would have never written this post. I would like to add a disclaimer here that, what I’m writing is just based on my personal experiences; it might not be the ultimate solution/guide for the problems.

Planning for Sikkim in November on my Apache 150 (2006 model). Two queries
Query: 1. Any adjustment to Carburetor required at the altitude if yes, what? (Checked with bike guru, he redirected to you!!)

As I have never been to Sikkim, I can’t say anything specific to Sikkim but based on my personal experience I had during my 4 visits to Ladakh and a single visit to Spiti Valley (both places have enough high altitude sections). I’ll say don’t touch the carburetor. I had gone to Ladakh and Spiti on my Fiero (Apache 150 engine and carburetor is very similar to that of Fiero) and I have never touched the carburetor or the air filter during the ride. The bike climbed up anything and everything that came in its way, including the Tanglang La during a snow fall, with a pillion and luggage of two people on board.

If I was in your position, I will just get the bike serviced before the ride and go on the ride.

Just in case you do decide to play with the carburetor, I’ll suggest you carry a main jet that is one size smaller than what you have in your bike (in case you want one on a loan, let me know). Switch the main jet, to smaller one, once you are at a high altitude, this will make the bike run lean (bike will be running richer as going higher in altitude, the air gets thinner and hence air/fuel ratio goes on richer side), remember to switch back to stock jet as you start to scale down the altitude, else it (running lean in lower altitudes) could damage your engine.

Query: 2. Changing both tyre and tube, the garage guy advised to go for Tubeless, not sure if this will create a problem, any guidance on this?

I’m a big fan of tubeless tyres. So, if you are getting tubeless tyres for your bike, I’ll say get them. But with tubeless tyres there is one big disadvantage, if during the ride due to some bad roads the rim gets damaged; it will result in air leak. As a result tubeless tyre will be rendered useless. So, to deal with such scenarios, do carry spare tubes with you, so that you can fit the tubeless tyre with the tube and run it like a normal tube type tyre.

In case you don’t want to fit the tubeless tyre and are worried about the tube type tyre getting punctured. During my last Ladakh ride, I used a puncture sealant called “Slime”. You can fill this liquid inside your tube and in case of a puncture caused by a object up to a specific size; the sealant will fix the puncture on its own. I did have an firsthand experience of seeing this solution at work. While coming back from my Ladakh ride, my Fiero’s rear tyre had a nail in it. I just removed the nail, in a couple of seconds the puncture was sealed by this solution and I was able to ride the bike, all the way from Sonmarg to Delhi without having to do anything else.

Ladakh – Yet again

It is that time of the year when roads to this wonderland starts to open and time for me to pay another visit to the land of highest mountain passes.

This year its going to be a special ride, during the ride I would be completing an association of 10year with Fiero. Together we have traversed this land of lamas thrice and hope to visit some new places this time.

To make things a bit more  adventurous, the road between Manali and Leh isn’t officially opened yet (with less than 2 days left for me to ride on it).

Spare Parts to Carry on a Road Trip

I’m going on a long road trip for the first time, on my motorcycle, what all spares shall I carry?” If you are having the above question, then read ahead.

How many times and which all parts in recent past (1month/1year/3years/10years), on your bike have failed you? Normally your answer would be “none” (that’s what it will be in most of cases). But if there are some parts that have failed more than once, in recent past, add them to the list as the first items (for example HT coil on one of my motorcycle). On a well maintained (regularly serviced & with all parts replaced whenever the need arises) bike, you shouldn’t have parts that would have failed frequently (here I’m talking about a bone stock bike).

So, if no part has failed, so far, on my bike why should I even bother to carry any spares? Well, there are certain spares that aren’t very expensive and don’t occupy too much space and aren’t too difficult to replace either BUT if they fail can land your bike in an unusable state. So, it’s better to be safe than sorry and carry them.
Following is a list of such spare parts:

  • Fuses
  • Spark Plug
  • Spark Plug Cap
  • Chain Link
  • Clutch lever
  • Clutch lever mounting clamp
  • Brake Lever
  • Brake lever mounting clamp
  • Cables: Accelerator, Clutch and Brake (if your bike runs on front drum brakes)
  • Headlamp bulb
  • Engine oil (if you are using one that is not easily available and you think during trip it will require to be changed)

Other than the above mentioned carry spare set of tubes (if your bike runs on tube type tire). Even if your bike runs tubeless tire, it is better to carry a spare tube just in case the alloy wheel is damaged and starts to leak air, fitting with tube can fix the problem.

One point to note is that, it’s important to know how to replace the spare part that you are carrying else often it would be as good as not carrying one. So, learn to change these parts and practice before you head out on that ride which you always dreamt off.

Though the following items are not exactly spare parts, one should also be carrying them:

  • Electrical wire
  • Electrical tape
  • M-seal

One might ask, for a long road trip the above mentioned list is fine but what about Ladakh? My answer is, Ladakh is no different than any long road trip. Yes, the terrain is different, so is the altitude and the help on road side is rare but other than how does it matter what all parts one should carry?

The list is kept short to only those parts that one can carry easily and don’t need much skill to change them and if they fail you might be left stranded. Though one can carry much more parts than the above listed but then are you preparing yourself for the worse? Than what about the “adventure” part of the road trip? In that case may be use a backup vehicle or better use some other mode of travel.

Now, if you wonder where in my city I can find a good place to get my motorcycle prepared or learn how to replace the above mentioned parts. Though I don’t have information for many cities but I can help you with Mumbai. In Mumbai Arpan & Reddy conduct sessions for leh riders free of cost and teach you basics of motorcycle maintenance. For all my long trips (including 3 Ladakh rides), my bike(s) were prepared by them.

Mailbox #2: String Reverse and Array Bound Checking

Query: How to reverse a string without using any variable. You are not even allowed to use a variable to store a string.

There has to be some temporary variables to be used, for looping over the string.
Reversing a string requires swapping first character with the last, second with second last, third with third last and so on. Now the problem requires the string to be reversed in place (without using any other buffer to store the reversed string). So, we will have to interchange the elements in the original string buffer itself. Following is a pseudo code for the same.

i = 0;
j = StringLength – 1;
while (i < j) { Swap i and j element of String ++i; --j; }

The swapping of the two elements can be done either using a temporary variable or using XOR operator.

Query: “C” doesnt provide boundation checking on array but it is still able to findout the length of array using the sizeof(). Why it cannot enforce boundation checking on array?

The reason why C is able to find out the length of array is because the length of array is part of its type declaration. As the type of a variable is known at compile time, sizeof operator can be used to find the length of array.
Faster execution speed would be one reason why C don’t do array bound checking.